
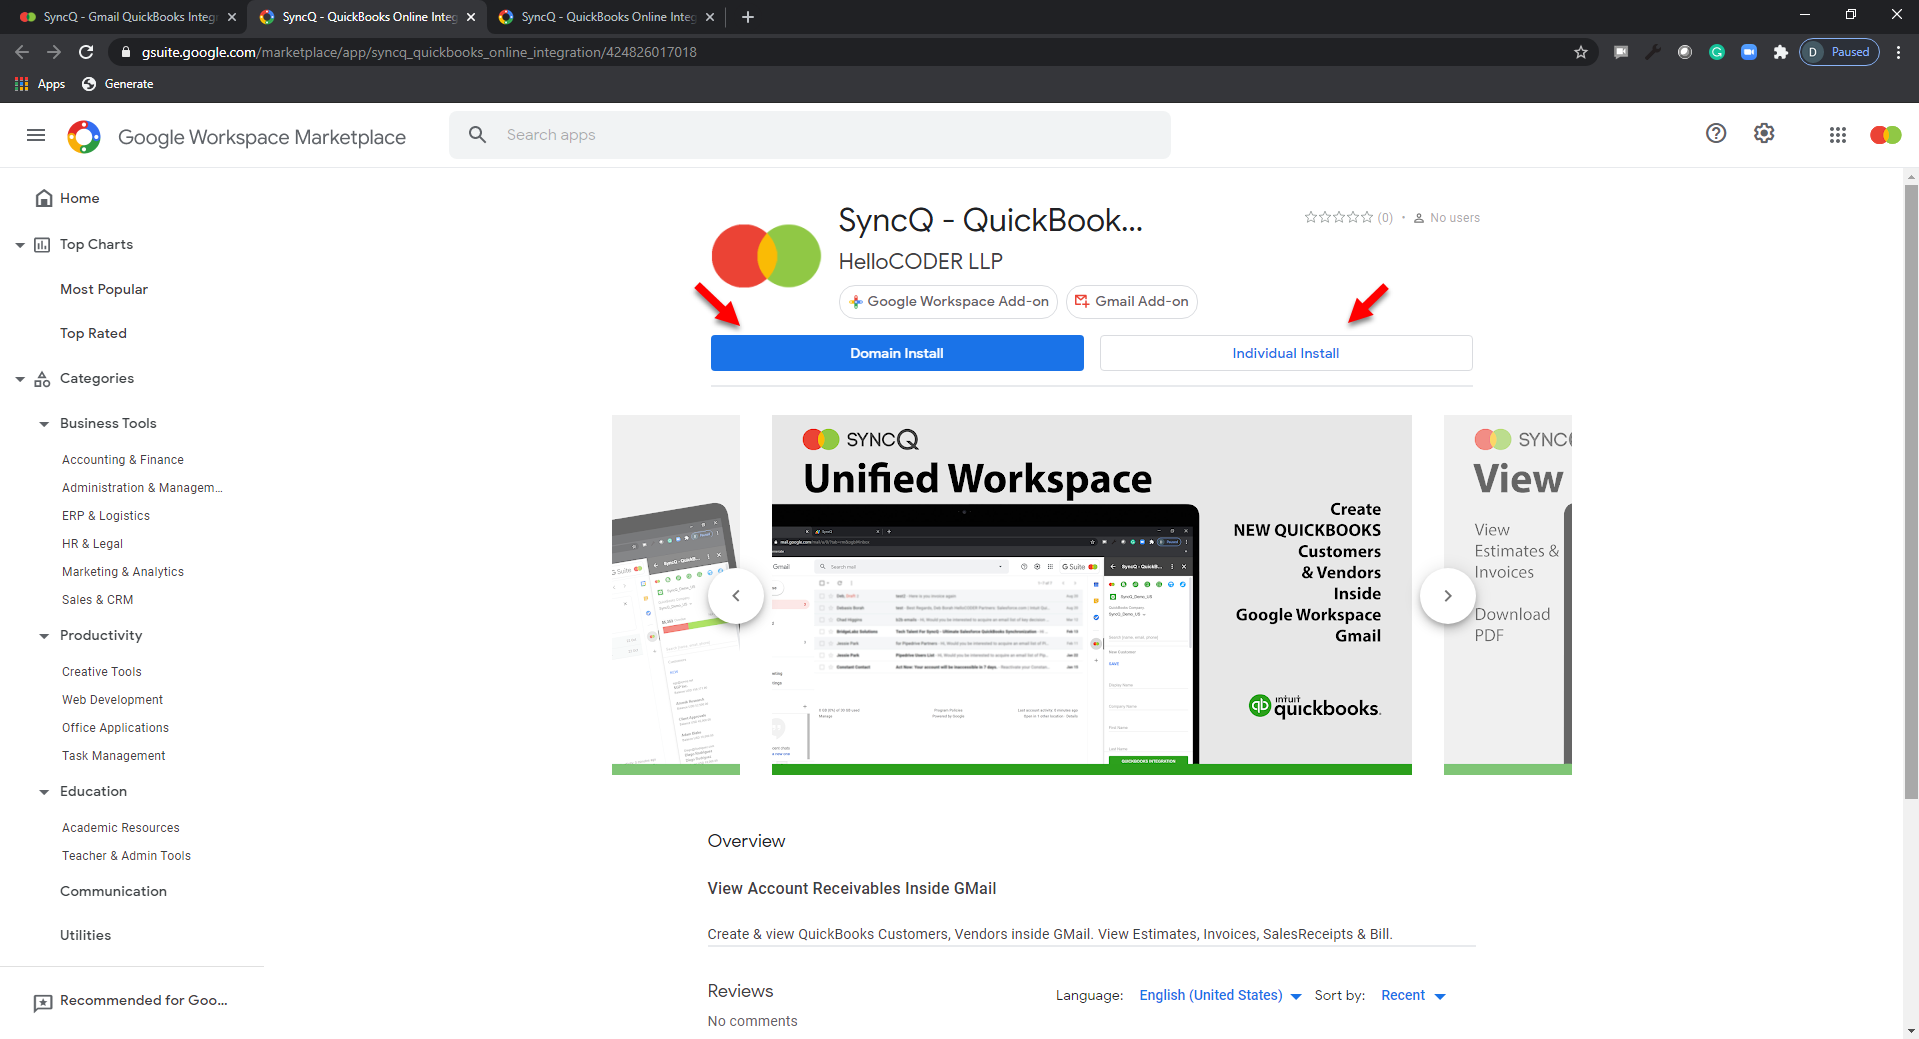
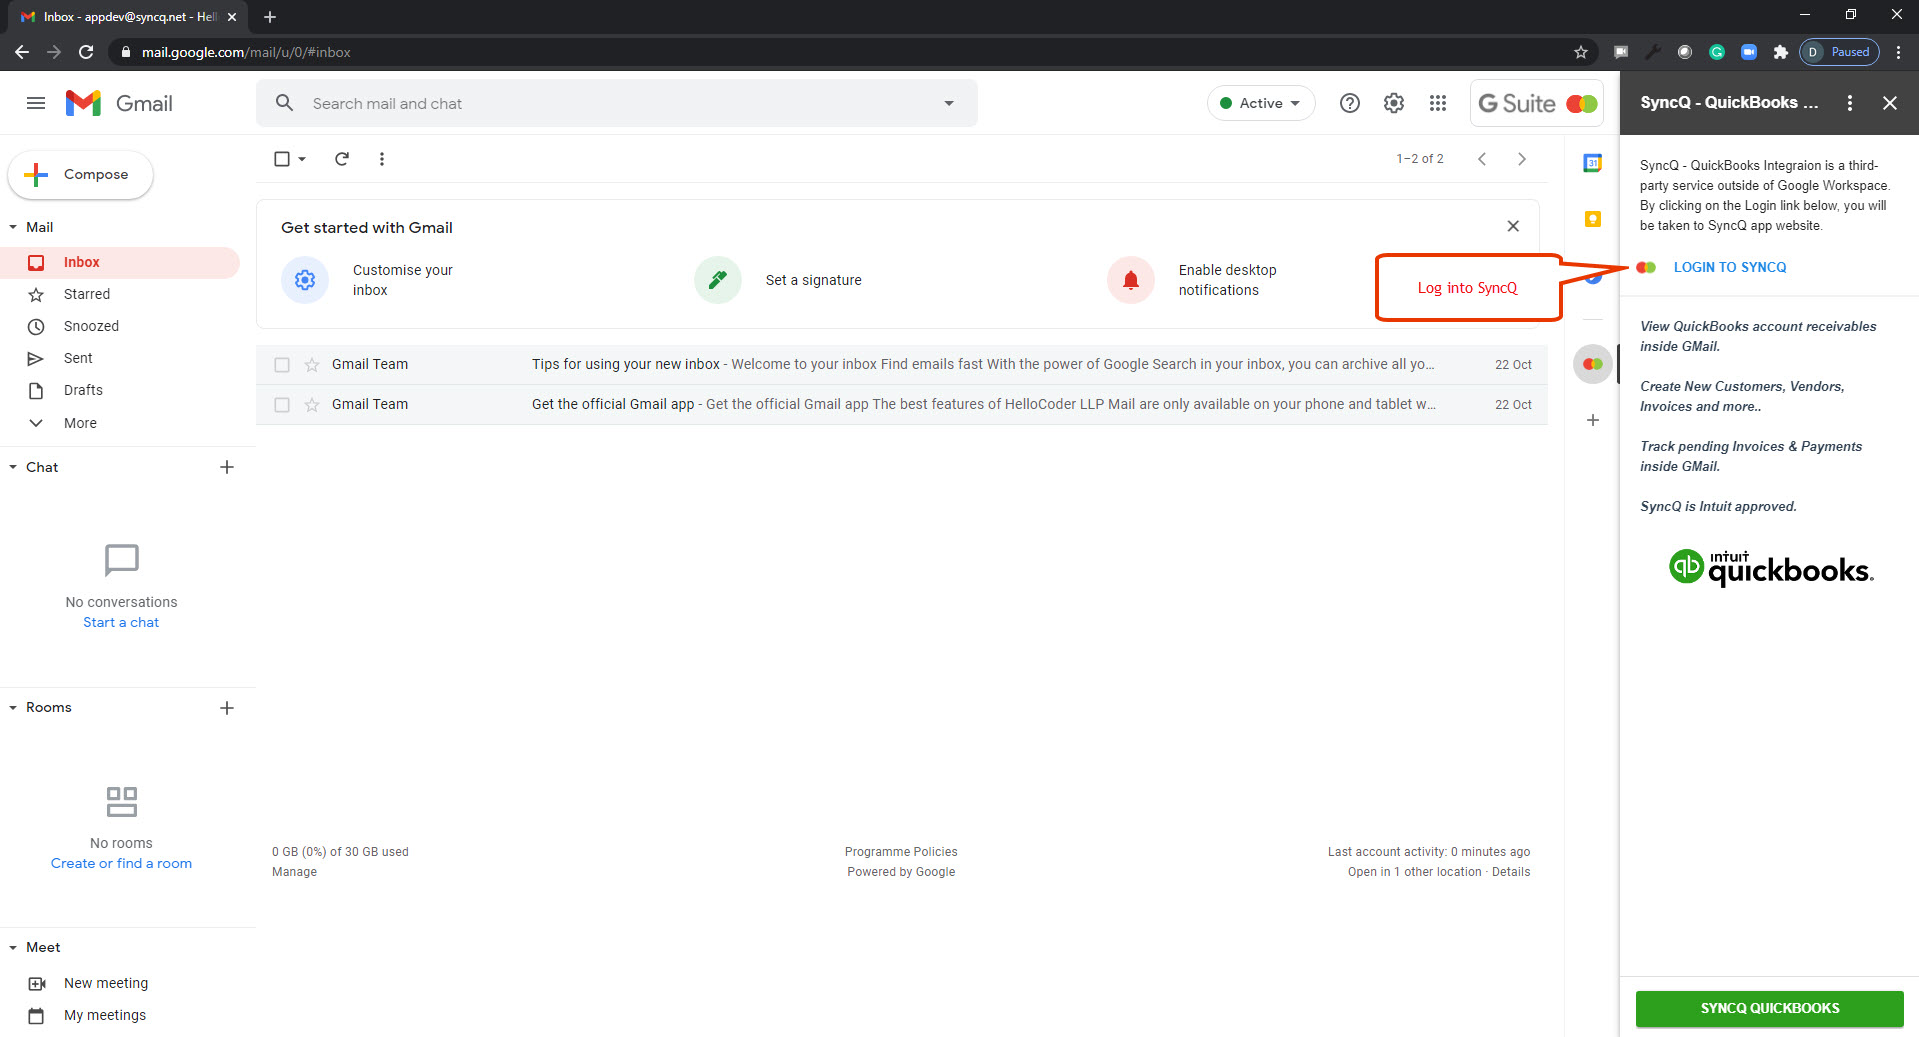
1. Install SyncQ in Gmail
1.1 Install SyncQ app to your
Gmail account: Click on the following link
Install .
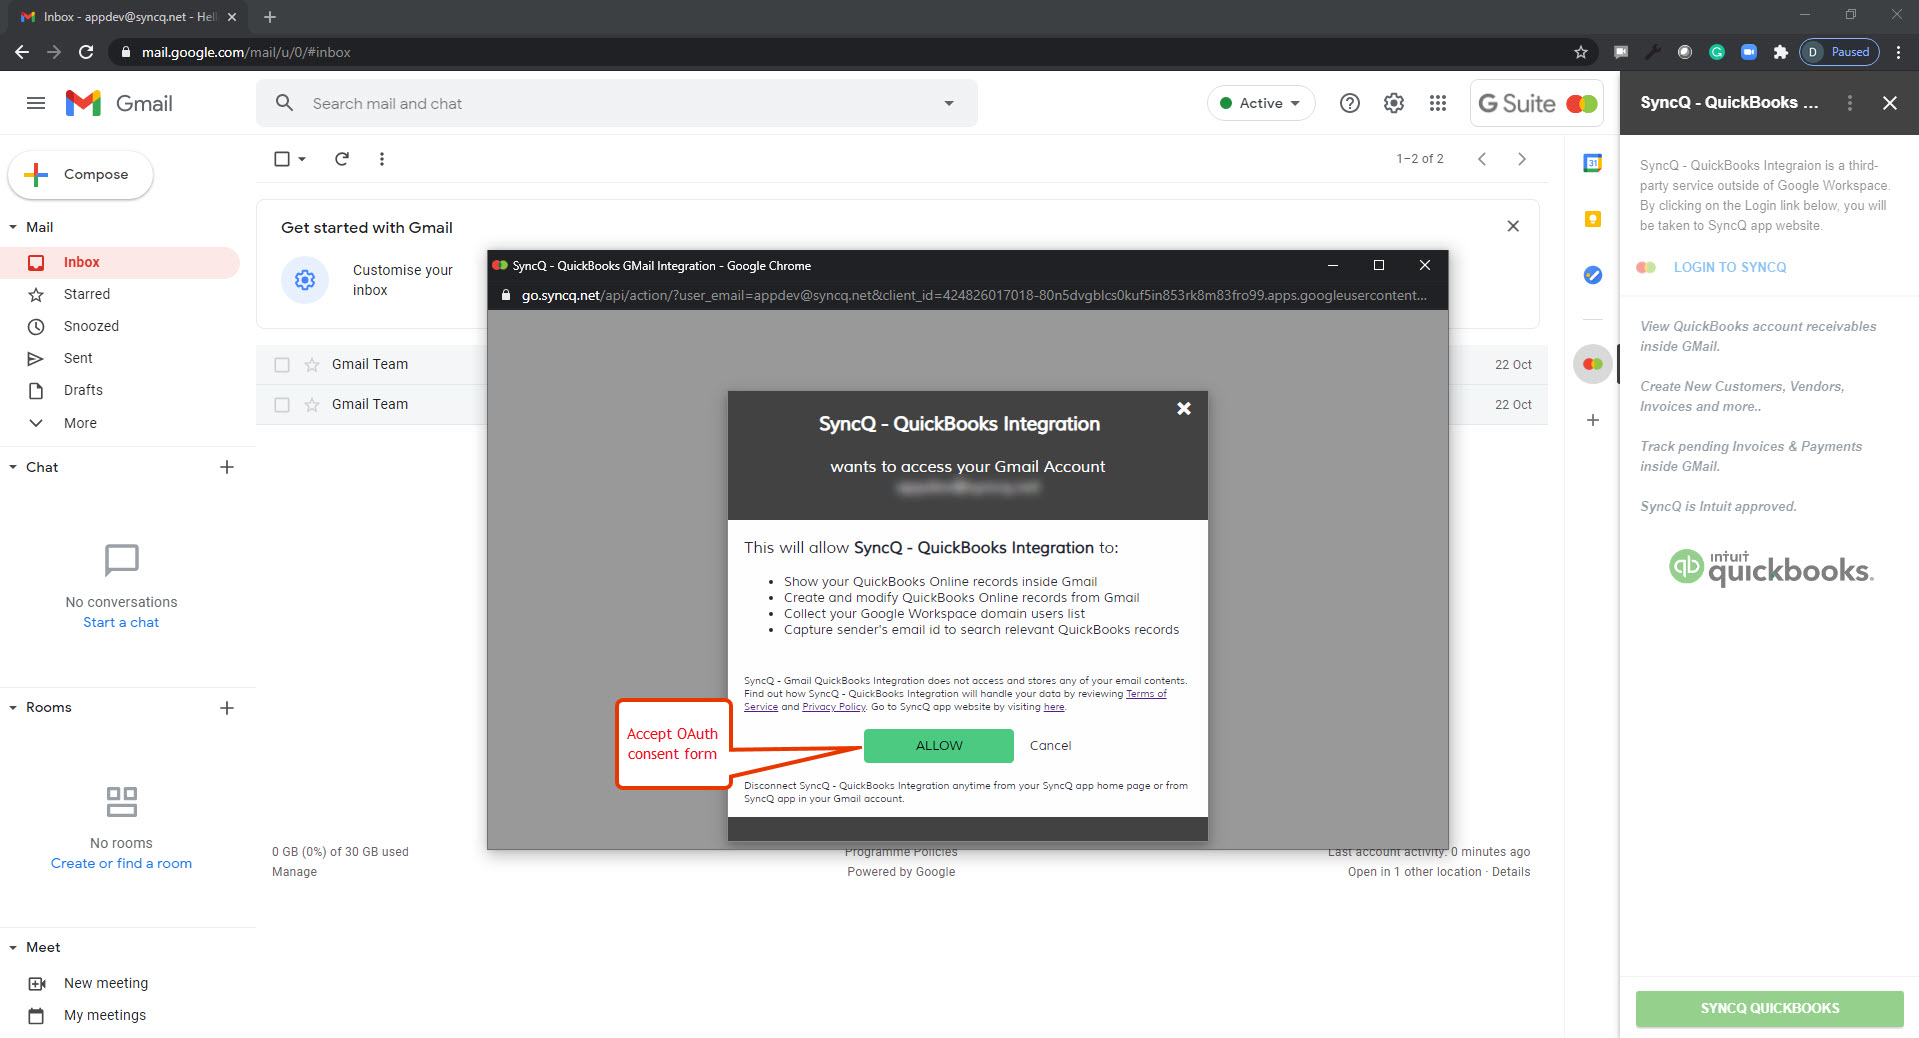
2. Connect and Authorize Your QuickBooks
Online
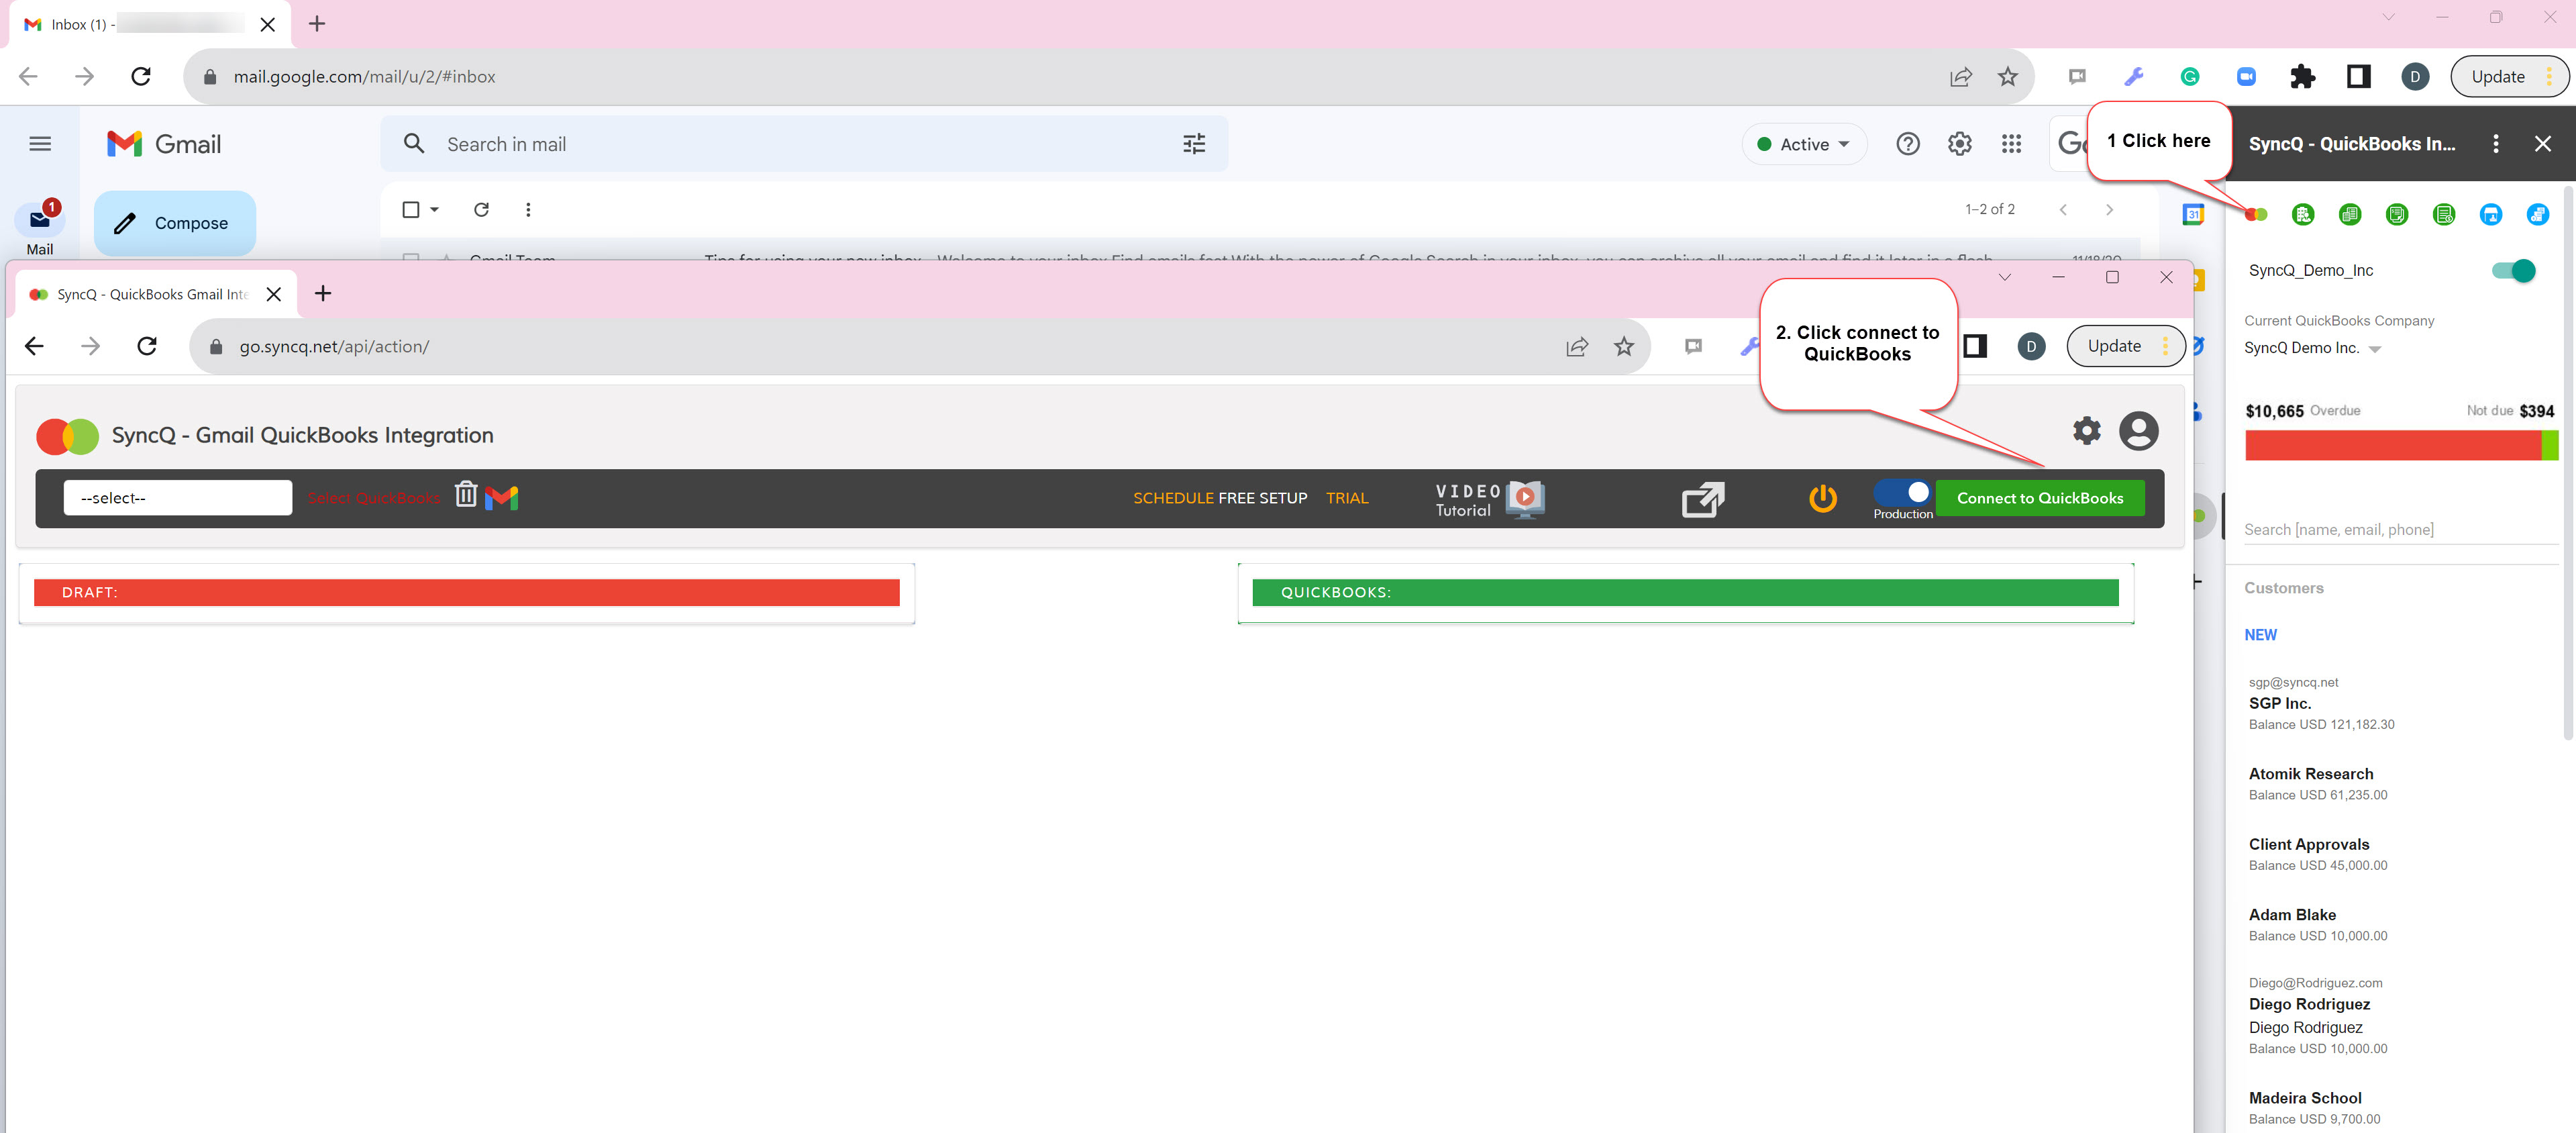
From SyncQ App page:
2.1 Click
Connect to QuickBooks
2.2 Fill up as follows:
2.1 Click on "Connect to QuickBooks" green button
2.2 This will open up a new tab, redirecting to QuickBooks app login page (https://appcenter.intuit.com/)
2.3 Login and authorize your intended QuickBooks Online company
2.4 Click Authorize
2.5 After authorization, you will be redirected to SyncQ app page
2.6 Your QuickBooks company will be automatically added in the drop down. Now, select QuickBooks company in the component dropdown. If everything working correctly, you will get
QuickBooks company name in green color next right to the company drop down. (If not authorized or incorrect company selected, a message will appear as "Require QuickBooks Authorization")
2.7 If you see your company name in Green, the green button will be replaced by a red button "Disconnect QuickBooks".
Congrats! We are good to start linking your QucikBooks
with Gmail.
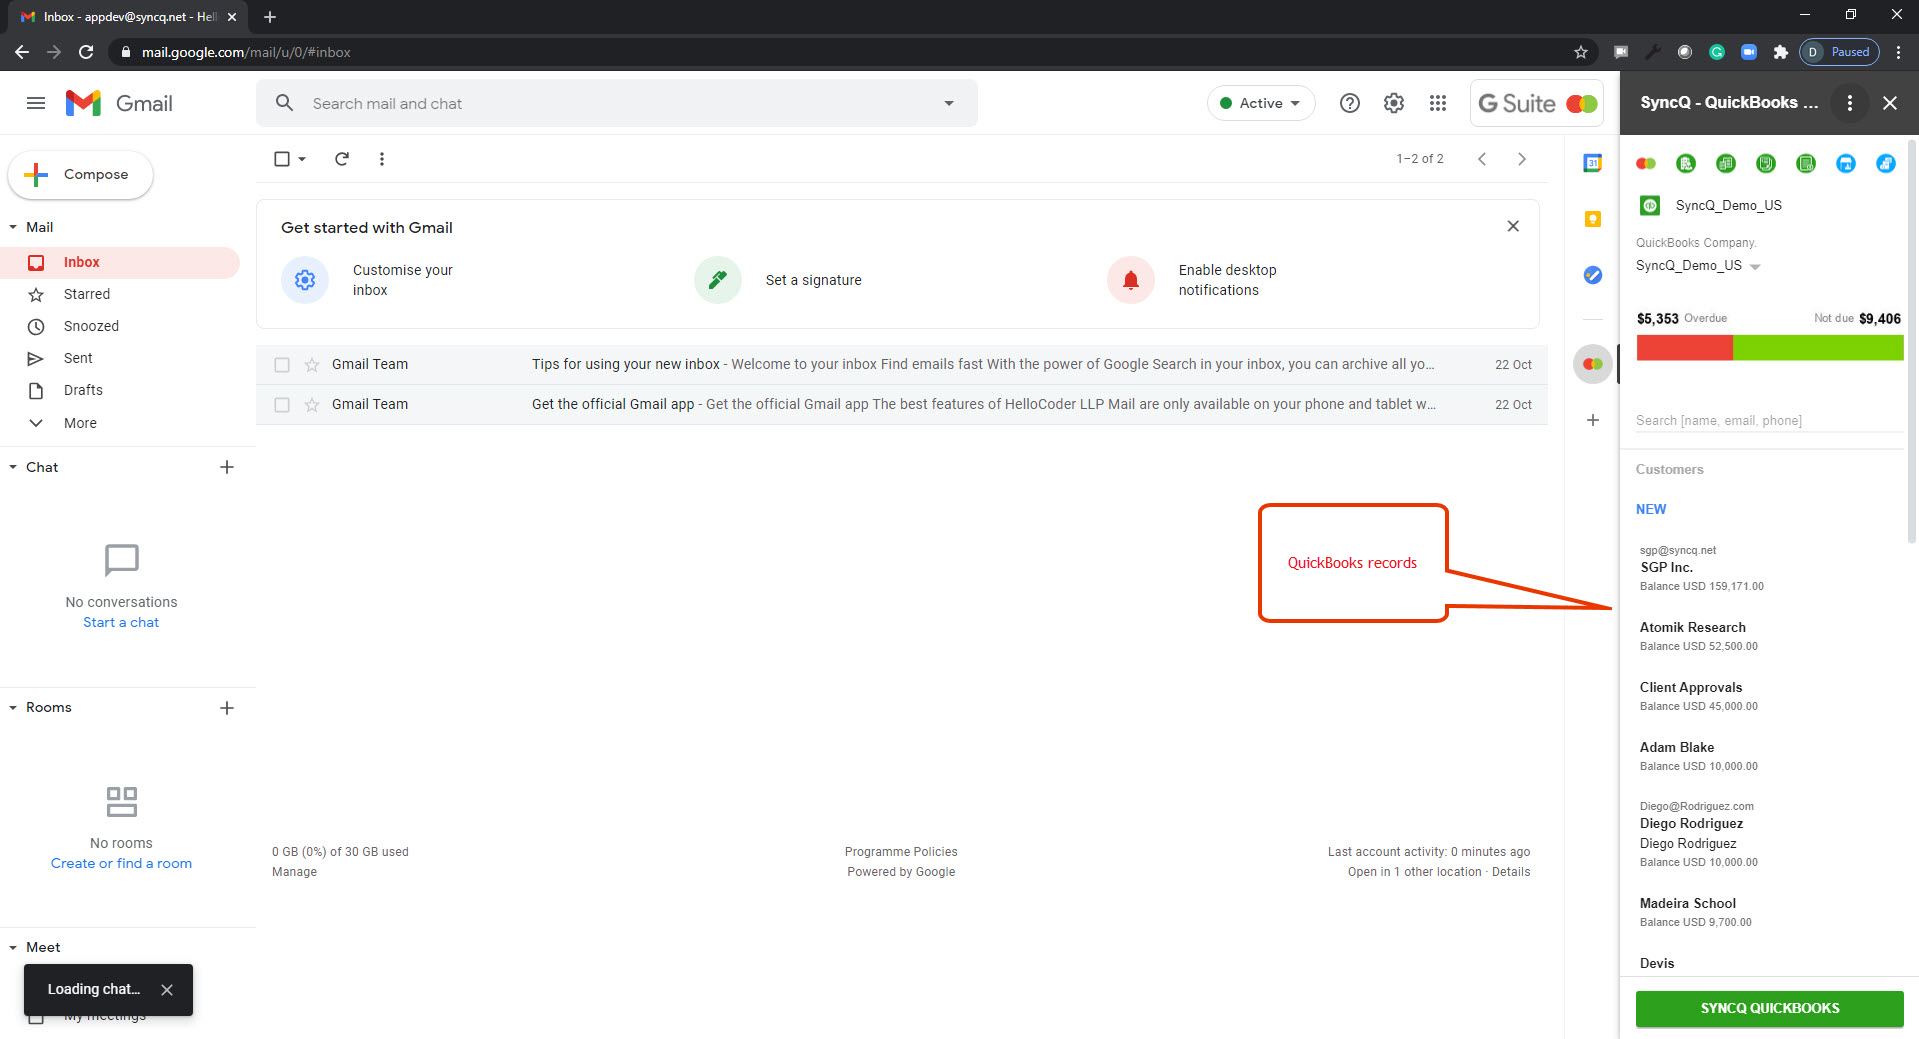
3. Start accessing QuickBooks records from Gmail
3.1 After you authorize your QuickBooks Online company, you are all set to access your QuickBooks records from Gmail. No further configuration required.
×
![]()
© HelloCODER LLP 2020 All Rights Reserved